DIY Christmas Cards with Embossers 🎄
DIY Christmas Cards: Add Elegance with a Custom Embosser 🎅
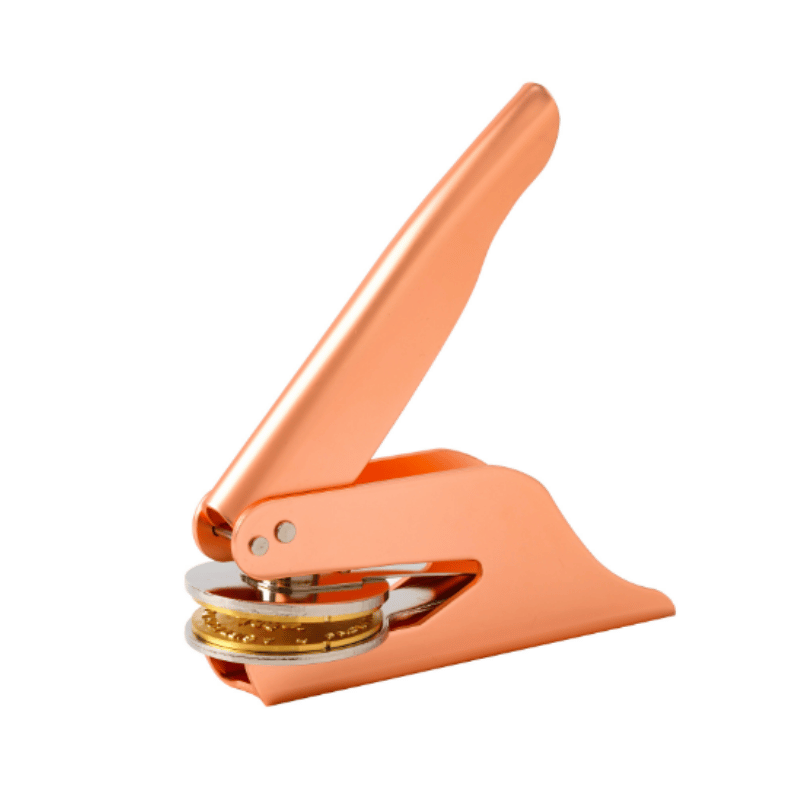
The holiday season is the perfect time to get creative and show your loved ones how much you care. With a custom embosser from GiftedChop, you can craft stunning, professional-looking Christmas cards that will leave a lasting impression. Whether it’s a heartfelt holiday greeting or a polished monogram, embossing adds an elegant, textured design that elevates your cards to the next level.
Let’s dive into this fun and festive DIY project!
Why Use an Embosser for Christmas Cards? 🎄
An embosser is a quick, clean, and professional way to add sophistication to your holiday cards without the mess of ink or paint. Here’s why embossing is a must for your Christmas crafting:
- Elegant Texture: The raised design creates a luxurious, tactile feel that instantly elevates your cards.
- Reusable Tool: Unlike stickers or stamps, embossers can be reused for all your holiday projects—and beyond!
- Versatile Designs: From snowflakes to monograms, embossers can create a variety of festive impressions.
- Professional Finish: Your handmade cards will look like they came straight from a boutique stationery shop.
👉 Shop GiftedChop’s custom holiday embossers here and start creating magic this holiday season.
For more inspiration on why embossing is perfect for holiday cards, check out Martha Stewart’s guide to embossed stationery.
What You’ll Need 🎁
To get started, gather the following materials for your DIY Christmas cards:
- Custom embosser (holiday-themed, monogram, or custom design) – Shop GiftedChop’s embossers here.
- Blank Christmas card stock or pre-folded cards (available at Paper Source).
- Decorative envelopes or papers in festive colors like gold, red, or green.
- Ribbons, stickers, or embellishments (optional, for added flair).
- Double-sided tape or glue (optional, for attaching decorations).
For tips on choosing the right card stock, read this guide on card-making essentials from The Spruce Crafts.
Step-by-Step Guide to Making DIY Christmas Cards
Step 1: Choose Your Design 🎨
Start by deciding on the embossed design you want to feature on your cards. Here are some popular holiday options:
- ❄️ Snowflakes for a classic winter theme.
- 🎄 Christmas trees to evoke holiday cheer.
- 🎉 Holiday greetings like “Merry Christmas” or “Happy Holidays.”
- ✨ Your family monogram or name for a personalized touch.
Need help coming up with a design? Check out these free holiday SVG files from Creative Fabrica for inspiration that can be adapted for embossing.
If you don’t already have a holiday-themed embosser, check out GiftedChop’s custom embossers here to create the perfect design for your cards.
Step 2: Emboss Your Card Stock 🖋️
This is where the magic happens!
- Place your card stock between the embosser plates.
- Align the design where you want it on the card—popular placements include the top center, bottom corner, or center of the card front.
- Press firmly to create a crisp and clean raised impression.
Pro Tip: GiftedChop’s embossers are ergonomically designed, making it easy to create perfect impressions every time!
For embossing best practices, check out this crafting guide from Cricut, which offers tips on aligning designs and achieving consistent results.
Step 3: Add Decorative Details ✂️
Once your card is embossed, you can add additional embellishments to make it even more festive:
- Use ribbons or bows to add dimension.
- Attach a small sticker or pressed flower for a unique touch.
- Layer your embossed card stock onto colored backing paper (e.g., gold or red) for contrast.
For more creative ideas, explore The Spruce's guide to Christmas card embellishments.
Step 4: Write a Handwritten Note 💌
No holiday card is complete without a heartfelt message! Use a high-quality pen to write your greeting inside the card. Here are some ideas:
- Reflect on cherished memories from the past year.
- Share your hopes and wishes for the upcoming year.
- Add a personal touch, like an inside joke or a line of poetry.
Pro Tip: Pair your handwritten message with your embossed design to create a truly personal and memorable card.
For inspiration on writing meaningful holiday messages, check out Hallmark’s guide to writing Christmas card messages.
Step 5: Finish with Matching Envelopes ✉️
Don’t forget to emboss your envelopes! Adding a festive design or monogram to the envelope flap creates a polished, professional finish.
Ideas for Envelope Embossing:
- Emboss your family name or initials on the envelope flap for a custom touch.
- Add a holiday design like a snowflake, wreath, or Christmas tree.
- Use festive-colored envelopes to complement your card design.
👉 Shop GiftedChop’s embossers here to create matching envelopes that tie your project together beautifully.
Why Personalization Matters for Holiday Cards 💖
Personalized holiday cards show your loved ones that you’ve taken the time to create something meaningful just for them. With tools like custom embossers, you can elevate your DIY cards into keepsakes that will be cherished long after the season is over.
Whether it’s a family monogram, a thoughtful handwritten note, or a festive embossed design, these small details make all the difference.
Start Crafting Your Holiday Cards Today! 🎊
Ready to wow your loved ones this holiday season? With GiftedChop’s custom embossers, you can create elegant, professional-looking Christmas cards and invitations with ease.
✨ Shop now and take advantage of our 20% holiday discount—available for a limited time!